Shaping a sound
Trims and sound edits are kept in Arkidome's library, not written into your files. They apply wherever the sound plays: previews, the drum machine, the melody, Copy To… and sends to hardware. Every change is one step of Edit > Undo (⌘Z).
The sample editor
Trim, sound edits and cue points are made in the sample editor, a drawer under the library, like the drum machine and the melody. It is open when you start. Select one sample, then press ⌥⌘S, click the toolbar's Sample Editor button, choose Sample > Show Sample Editor, or click Open Sample Editor in the inspector. The drawer shows the waveform wide, with the Trim, Edit sound and Cue points panels beside it. Its instructions step aside after your first trim, cue, tag or Edit sound change; the small ? in the header brings them back.
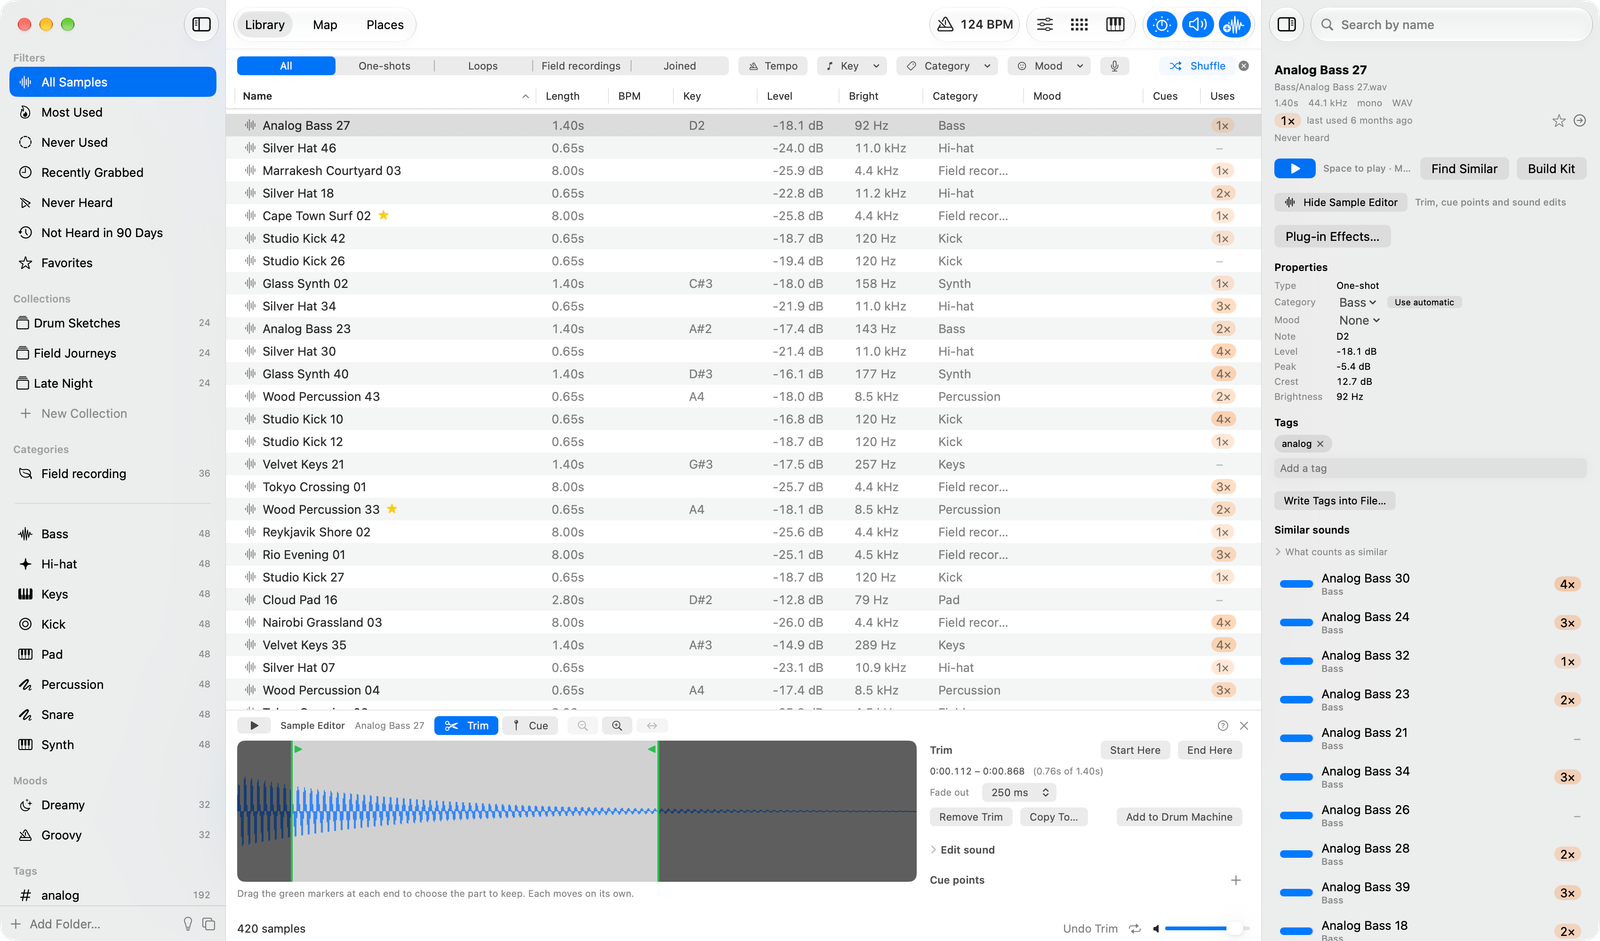
Two buttons above the waveform pick a tool: Trim (T) and Cue (C). Press a tool's key again to switch it off. With no tool, click the waveform to play from that spot. The drawer works on one sample at a time; select several and it asks for one, and the inspector still edits a whole selection at once. The drawer, its tool and whether its instructions are folded are remembered between launches.
Cue points
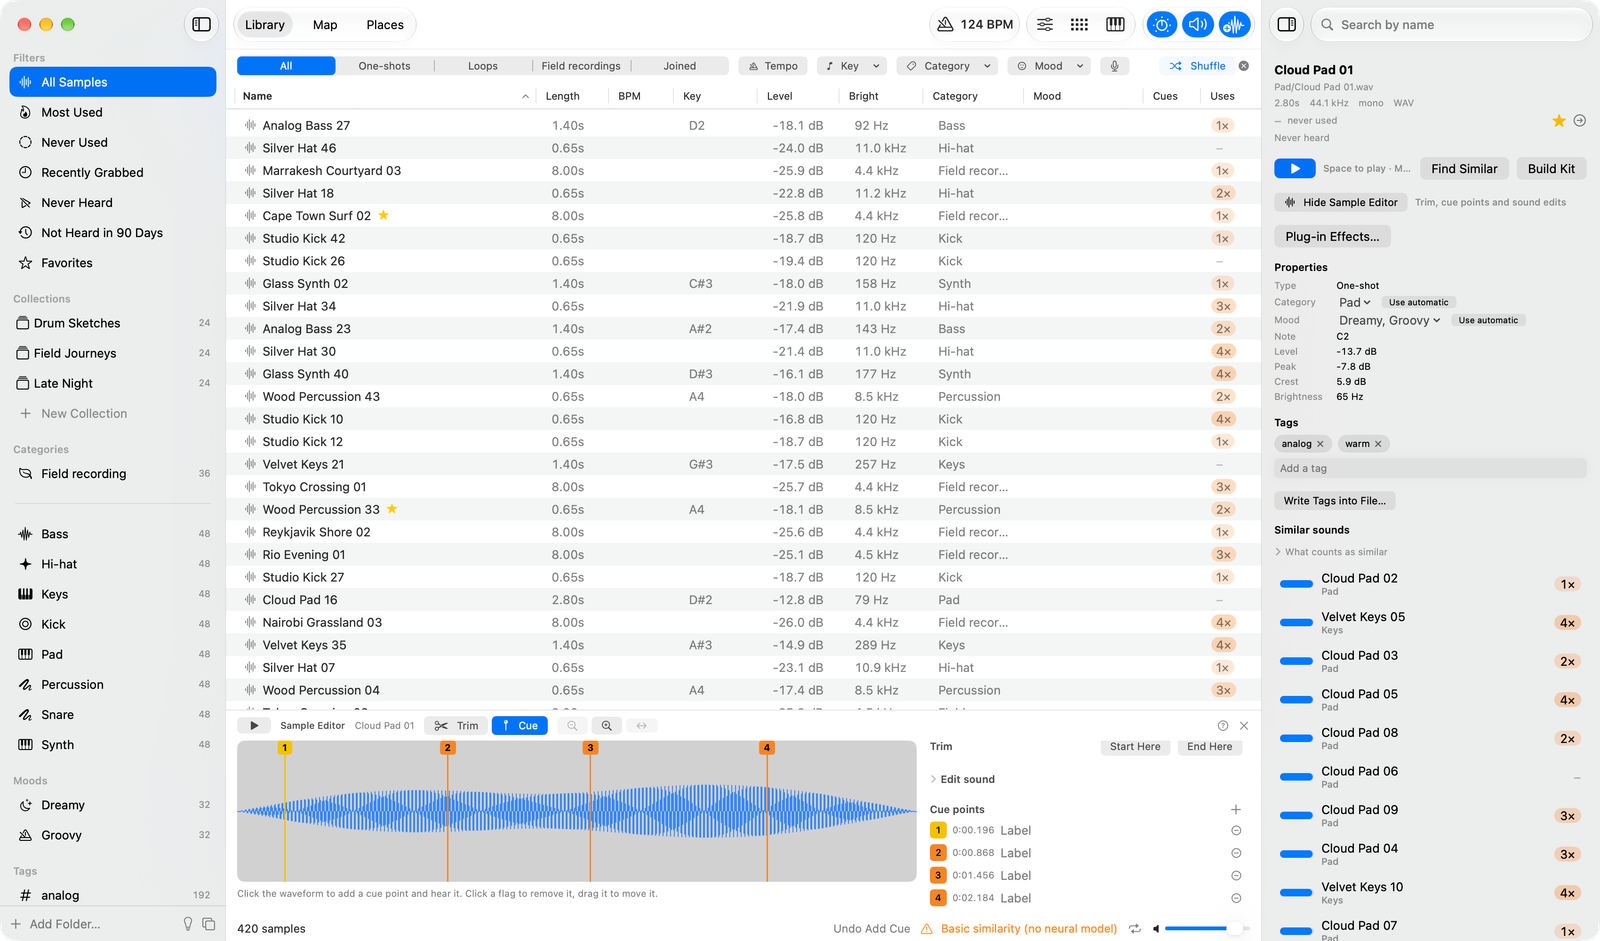
Cue points are read from WAV and AIFF files. In the sample editor, choose the Cue tool (C): click the waveform to add a cue and hear it, click a cue's flag to remove it, drag it to move it. Without a tool, click the waveform to play from a spot, then press M to set a cue exactly there. Press 1 to 9 to play from a cue. With Loop Playback on, each press of play starts from the next cue, so you can hear them one by one.
The Cue points panel lists them: click a number to play from that cue, type in the label to rename it, and use the minus button to remove it. Cue edits are saved at once, and a moment later WAV files get them written in, so other software sees them too: only the cue part of the file changes, and the write is checked before it replaces the file. Other formats keep their cues in the app only.
Trim
Choose the Trim tool (T) and drag the marker at each end of the waveform to set where a sample starts and ends. Each marker moves on its own. Start Here and End Here set an end at the spot you clicked on the waveform (or at the playhead). The panel shows the trimmed length and a Fade out you can set from short to 3 seconds. Remove Trim puts the whole file back. Waveforms and trims cover the whole file, however long.
Edit sound
Open Edit sound in the drawer, under the trim. It opens by itself for a sample that already has edits:
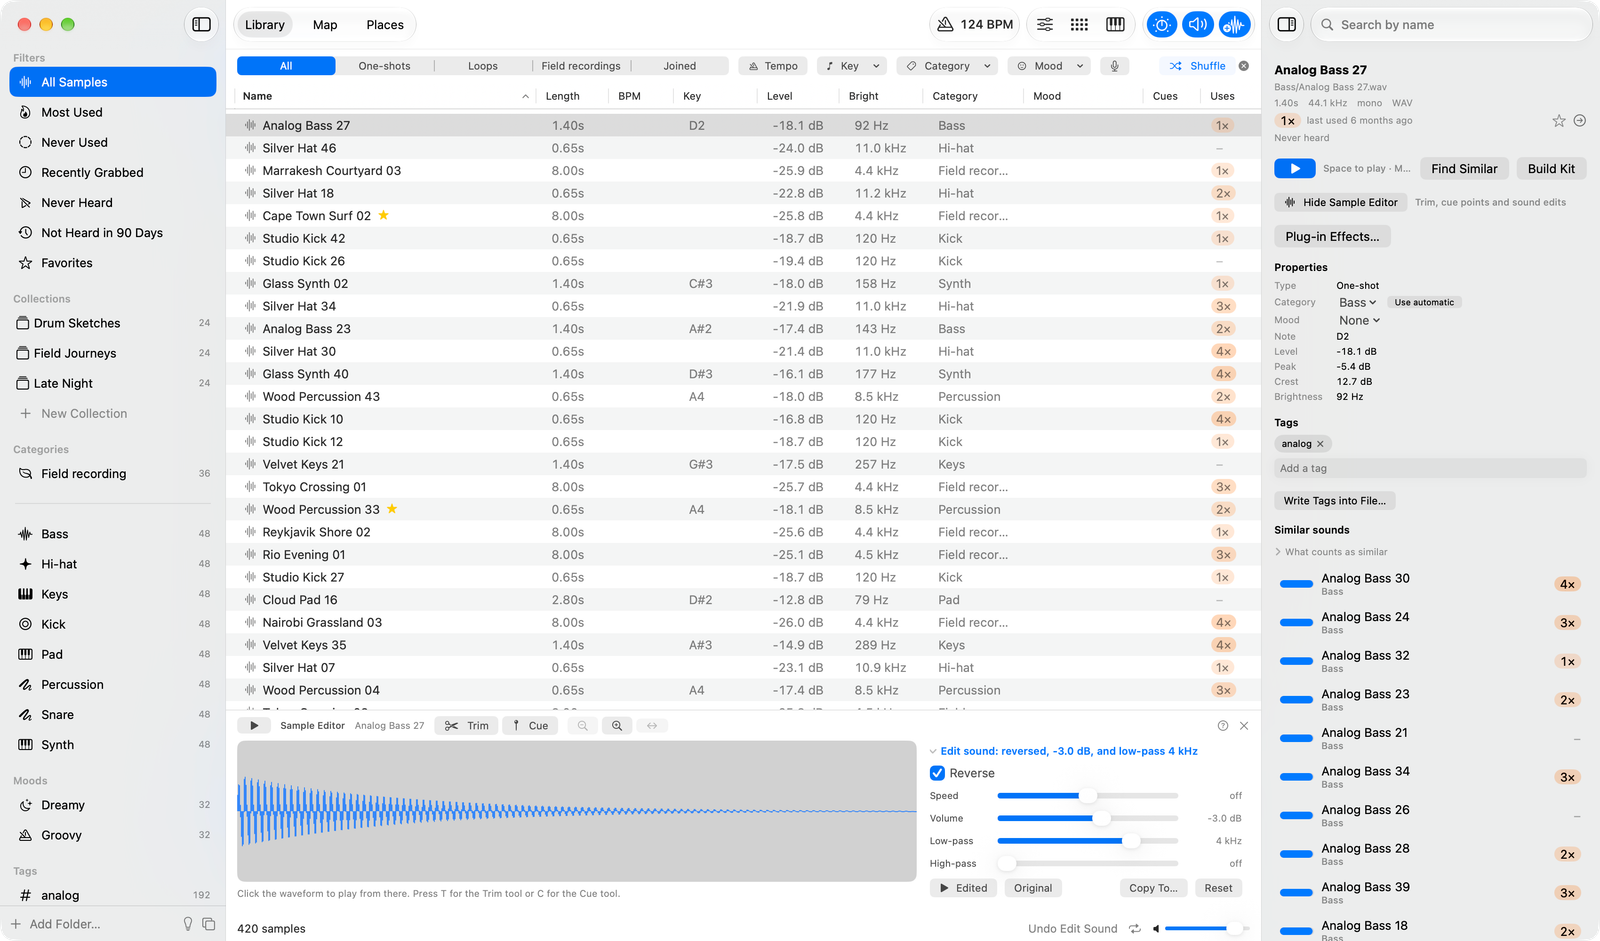
- Reverse the sound.
- Speed: -24 to +24 semitones, tape-style, so pitch and length change together.
- Volume: take off up to 24 dB or add up to 12 dB.
- Low-pass cuts highs and High-pass cuts lows, at 24 dB per octave.
Edited and Original play the two to compare, Reset takes every edit off, and the drum machine names an edited sample. Fades come after the edit, so a reversed sound still fades in at its new start. Similarity, the map and tempo or key stay judged on the original sound. Pitch shifting without a change of length is not included.
Noise reduction
Field recordings have Reduce Noise; see Field recordings and places.
VST 3 and CLAP effects
Open the toolbar's Effects drawer, choose Sample > Plug-in Effects… (⌥⌘E), or use the right-click menu or the
inspector button. Add Effect builds a chain from left to right; bypass, move or remove each card. Add Effect lists the effects you installed in ~/Library/Audio/Plug-Ins/VST3 or
/Library/Audio/Plug-Ins/VST3, and CLAP effects from ~/Library/Audio/Plug-Ins/CLAP or
/Library/Audio/Plug-Ins/CLAP. Add Effect groups them under VST3 and CLAP, and both kinds work the same way.
Choose Rescan plugins after installing one.
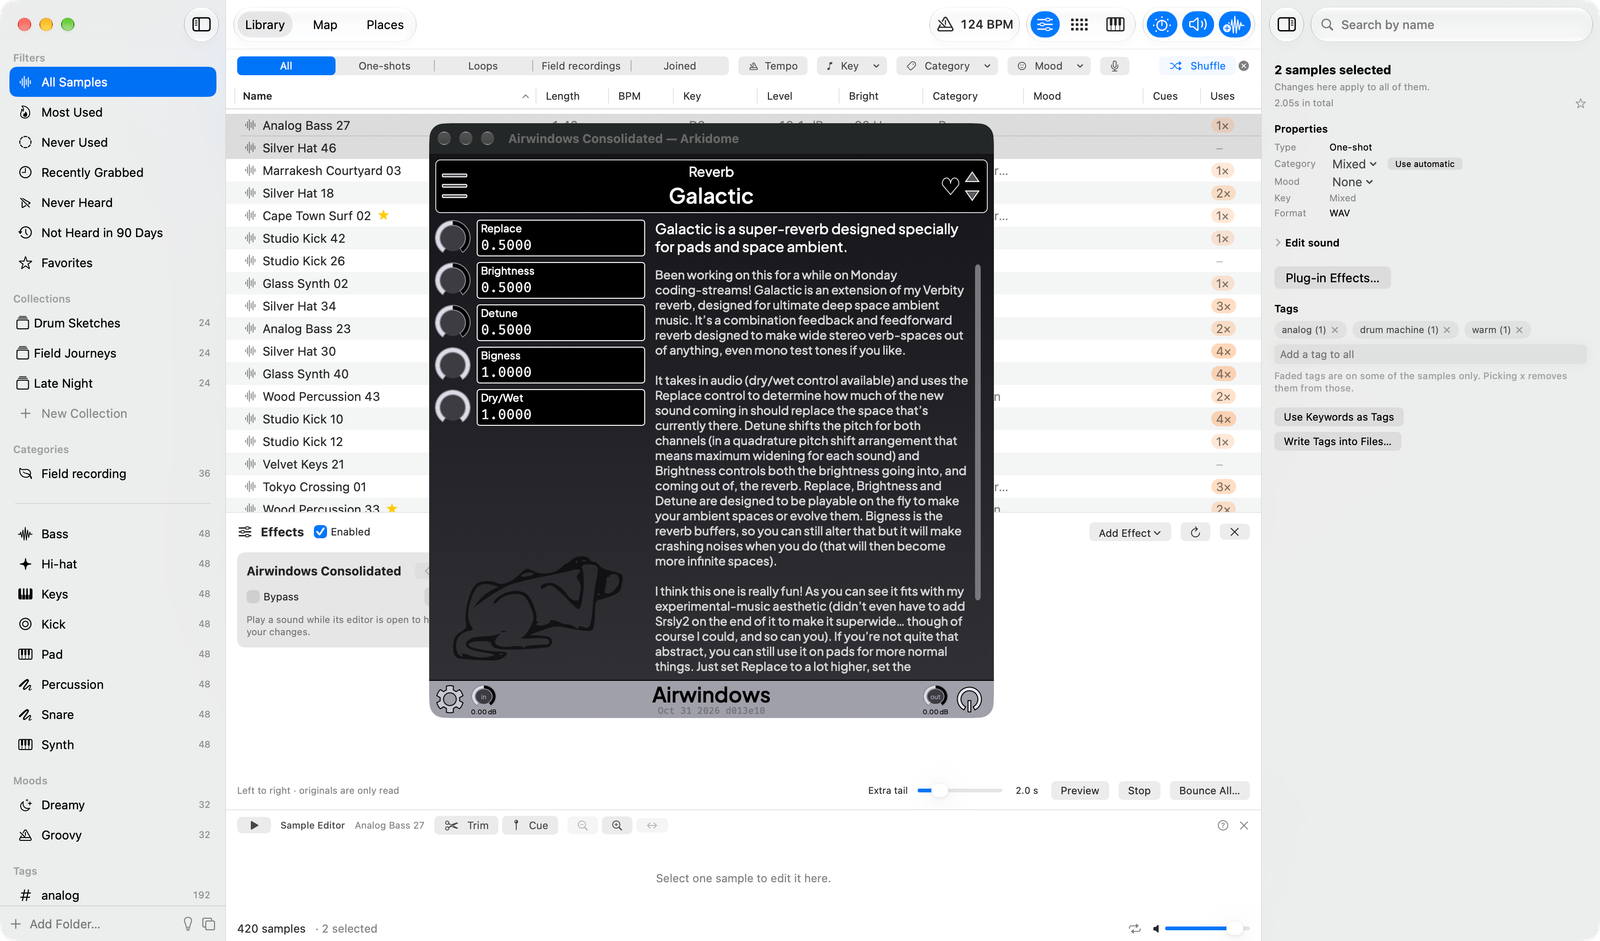
The editor in the picture is Airwindows Consolidated, an open-source example that is not included with Arkidome; an effect you install has its own editor here.
- With Enabled checked, play sounds in the Library or Map as usual to hear them through the chain. Preview repeats the selected sound.
- Open Editor… opens the effect maker's own controls; effects without one get sliders.
- Bounce… saves one selected sample through the chain; Bounce All… does it for a whole selection, into a folder. Bounces are stereo 32-bit float WAV at the sample's own rate, include the effects' tails, and never replace the original.
- The chain is for auditions and bounces only: it does not change the drum machine, the melody, Copy To… or Join Samples….
Effects run in a separate helper, so an effect that crashes reports an error while Arkidome keeps working. Stereo effects are supported; instruments, MIDI effects and sidechain inputs are not. A plug-in is third-party software that runs with your permissions, so install them only from makers you trust.